
Raisin Scones
Apparently I pronounce the word “scones” wrong. I grew up in the Canadian Prairies and have been informed by my dear husband that we prairie people pronounce some words differently than those “out east”, this being one of them.
I say scONs while many here say scOHnes. Regardless of how you pronounce it, these are delicious!
Last week I was invited to a potluck brunch with some Bible study friends. Many said they would bring some kind of a casserole (all of which were delicious, by the way!) but I didn’t want to bring another one when there would clearly be plenty to go around.
So, what does a dessert maker bring to a brunch? Cake didn’t seem right. Neither did cookies or trifle or brownies or anything that I normally make. I considered homemade bread, but that didn’t seem to fit the bill either. I decided to go with biscuits, butter and jam, until I remembered my Grandma’s scones.
It had literally been years since I had been able to eat any of her scones and I wondered if I had her recipe in my childhood recipe book.
Alas, there was no recipe for scones, but as I racked my brain, it dawned on me that she might have used our community cookbook for her recipe so I decided to look there.
Success! Well, mostly. I realized that the recipe was rather vague as to instructions but I decided to wing it, and if it didn’t turn out – no sweat! I’d just be up the creek for taking my offering for the potluck. (You know there’s nothing like procrastinating until the morning before before making stuff, right?)
Thankfully I have made enough biscuits to know that keeping the butter cold, cutting it in like pastry, and handling the dough as little as possible makes them light and airy. So that part worked out well.
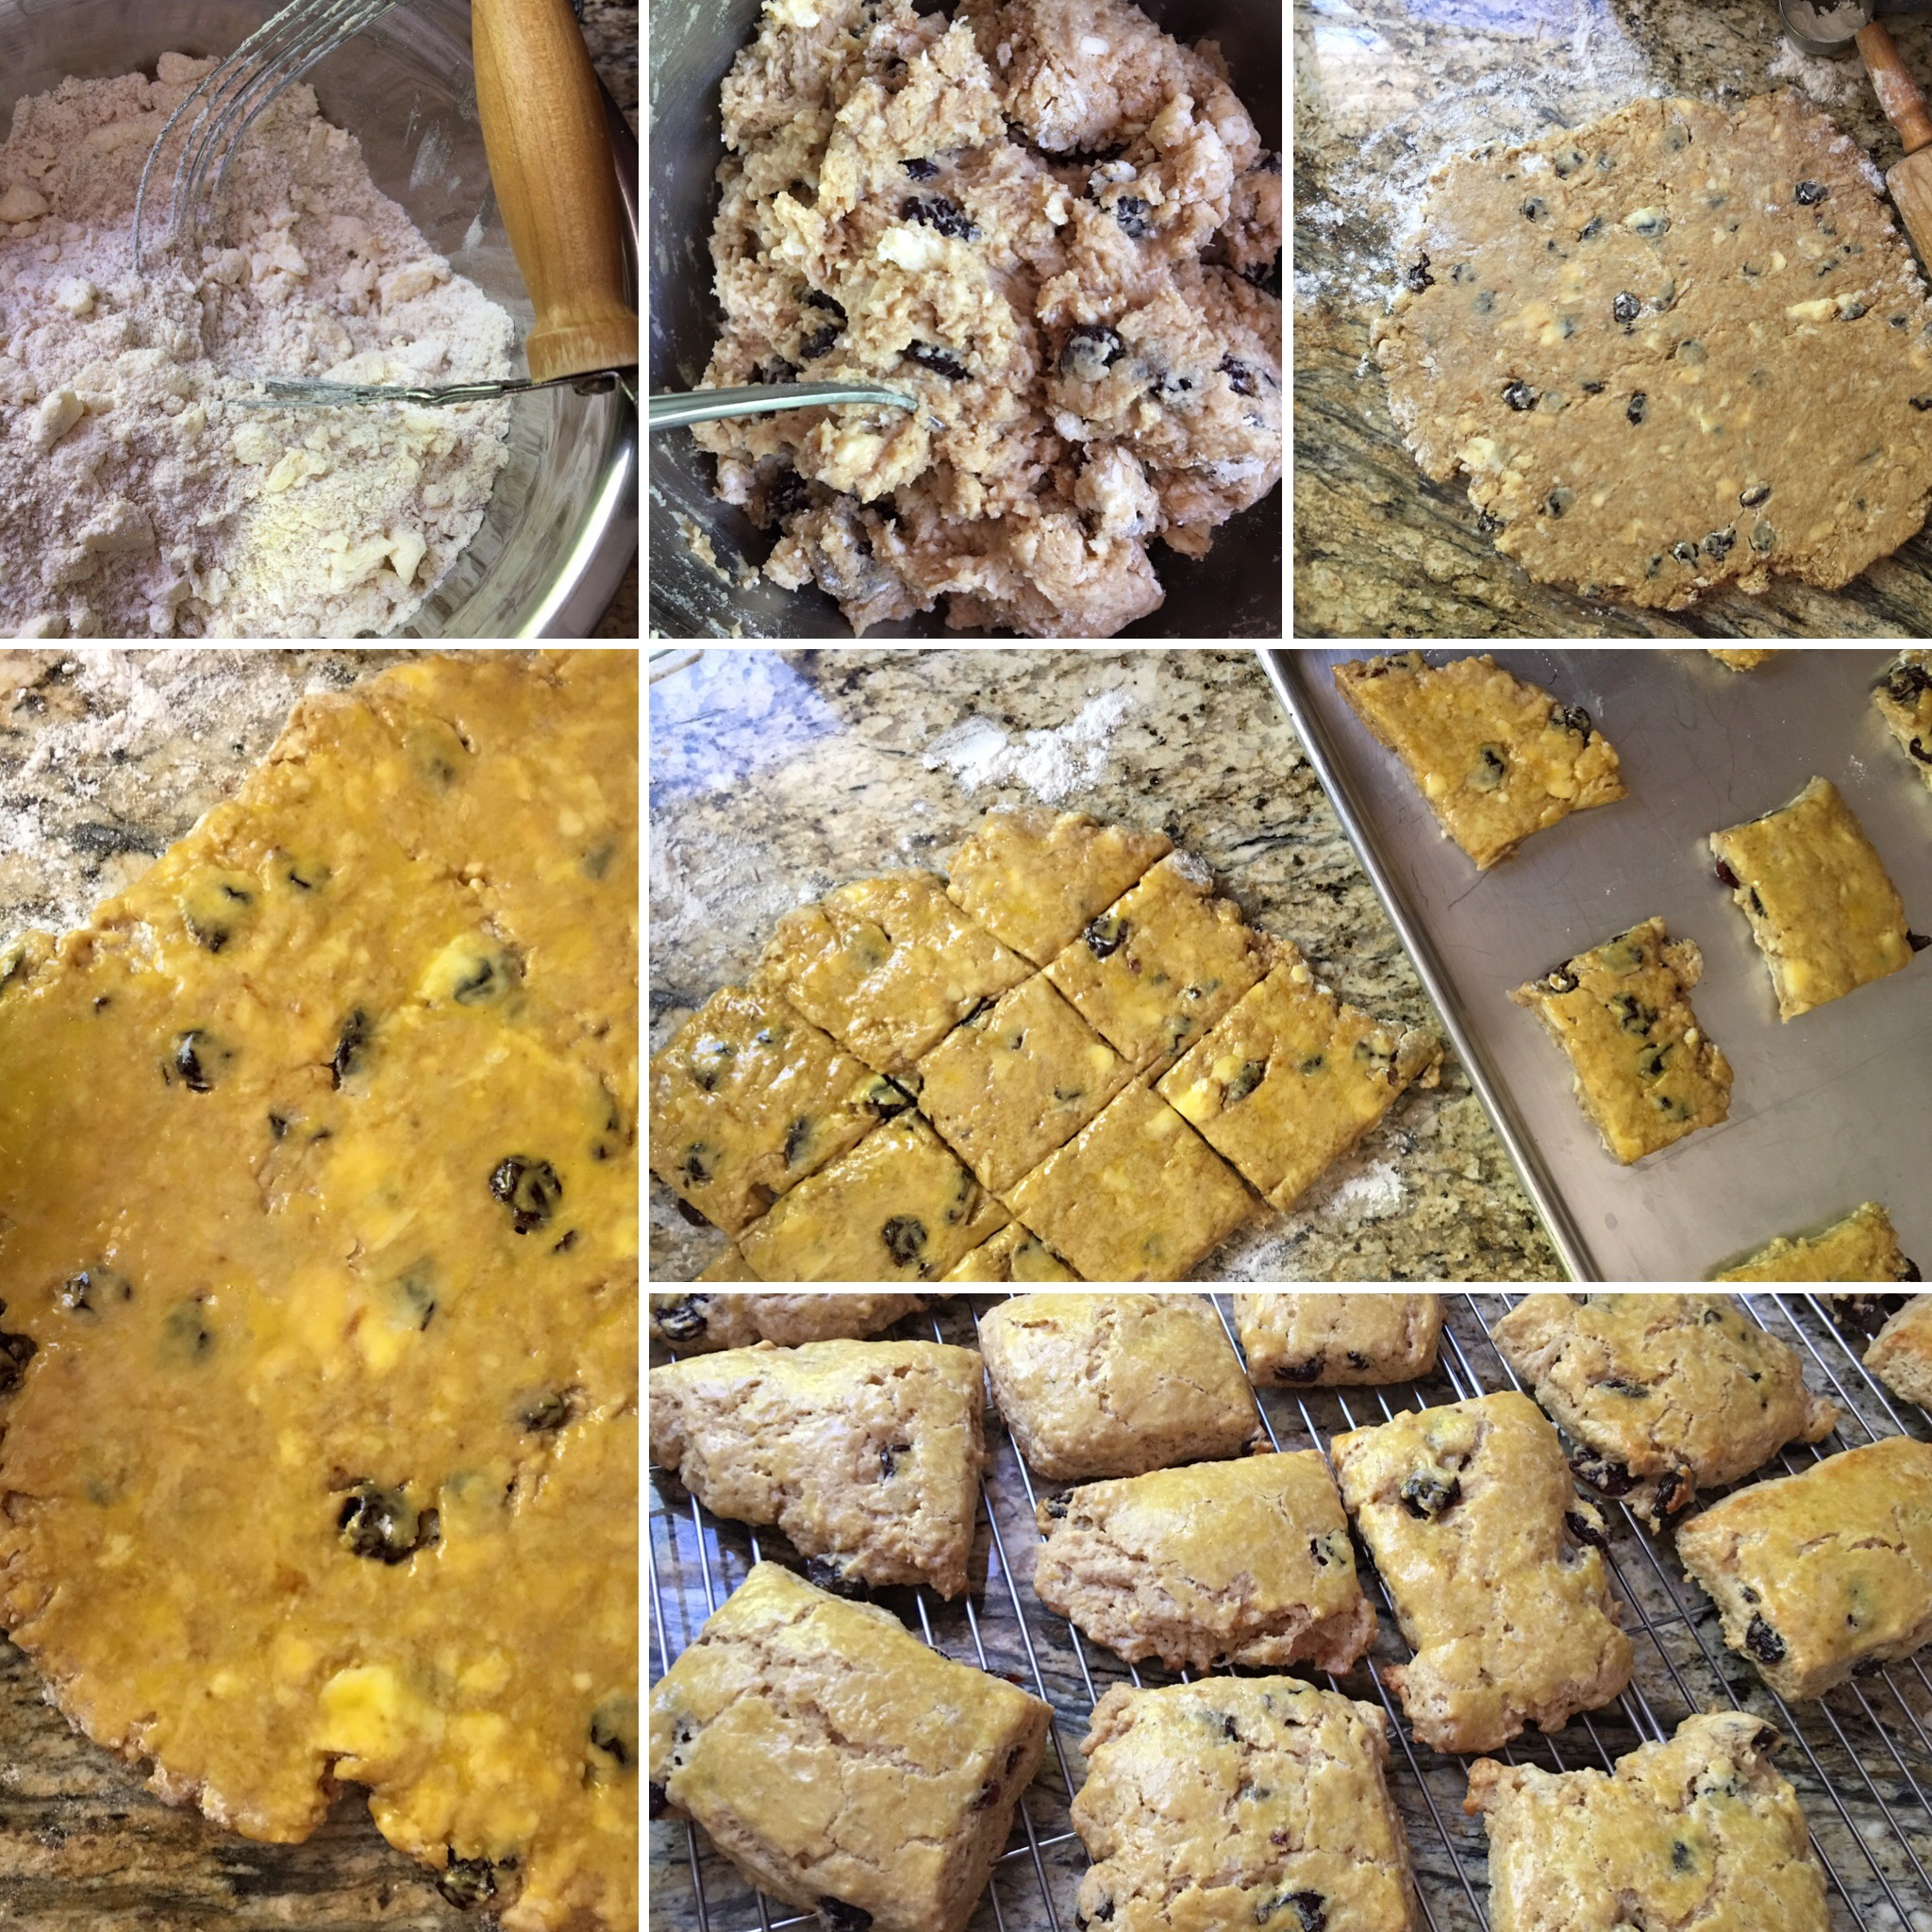
Step-by-step making the scones
The raisins I had hiding in my cupboard were a little on the dry side so that added another step in my limited time. To make them plump and juicy again, I poured boiling water on them – enough to cover them in a small pan – and then let them boil on the stove for a few minutes while I made the rest of the dough and pre-heated the oven.
If you need/want to plump the raisins, I would recommend preparing them well before making the dough because they were quite warm when I added them and I was afraid that the heat might botch the magic that happens in the hot oven with the butter. Luckily, it didn’t seem to make much of a difference.
I also knew roughly what size to cut them after I rolled the dough out – at least, I thought I did! Turns out they grew and spread a bit, just like cookies, so they ended up bigger than I expected.
I was so uncertain if they had turned out the way that I expected, I actually broke off a corner of one before I left the house, just to be sure.

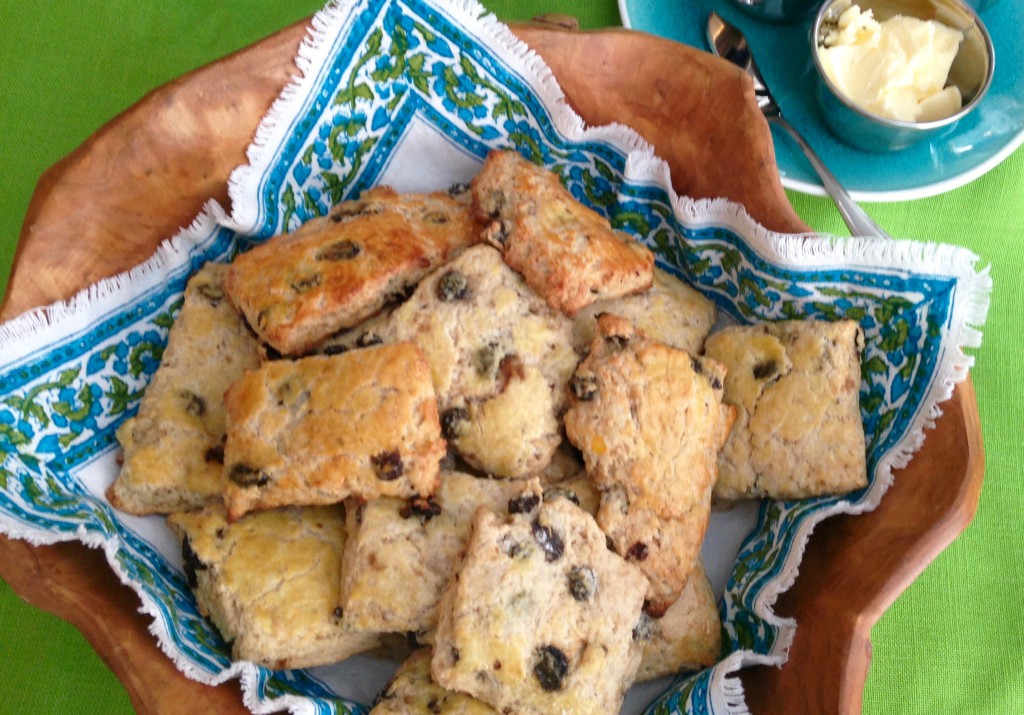
Scones – with jam
And they were so good! Light, airy, sweet, but not too sweet, with tender and juicy raisins. They really didn’t need anything else, but I still brought butter and jam, just in case!
This week, just to be sure it wasn’t a fluke, I made them again, this time with dried, tart cherries instead of raisins and they turned out just as tasty.
I hope that you enjoy them as much as the ladies and I did that day. And I’ve expanded the instructions from the original recipe to make it easier for you to make.

- 3 cups flour
- 2 tsp baking powder
- 1 cup brown sugar
- ½ tsp salt
- 1 cup raisins (or other dried fruit)
- 1 cup cold butter
- 1 cup cold milk
- 1 egg, separated into white & yolk
- 1 tsp water
- Mix dry ingredients (flour, sugar, baking powder, salt) together well.
- Cut in cold butter with pastry cutter or 2 butter knives. When you're don't, mixture should resemble coarse oatmeal.
- Add raisins.
- Add milk and beaten egg WHITE a small bit at a time until the dough sticks together and is a similar consistency to cookie dough. You may have a little milk left over - that's okay.
- Roll out onto a floured surface to approximately ½" thick.
- Beat egg YOLK and water together and brush on the top of the dough.
- Cut into squares 2-3" square. Odd shapes are okay, too.
- Bake at 400F for approximately 15 minutes. They are done when they are brown around the edges and on the bottom when you lift them up.
- Store in an air-tight container.
- Can be frozen for later.
- Serve warm from the oven or warm up in a microwave before serving.
Let me know what kind of fruit you use and how yours turn out.